There are lots of web tools out there to help you make fun animated GIFs, Adobe Express and Canva of course come to mind... but my school districts pay for WeVideo subscriptions, and there is SO much that you can do with WeVideo other than making, well... videos!
You can save as GIF, create simple animations, or export audio-only files (awesome for podcasting or songwriting!) Below are the steps that I use with 4-5th grade students to animate objects they create in class - this example is a sewing project, but could be easily adapted to other small sculptures, drawings, or paper crafts. Enjoy!
WeVideo Animated GIF Project: Holiday Tree Edition
You will need: Photo of tree ornament on green backdrop | 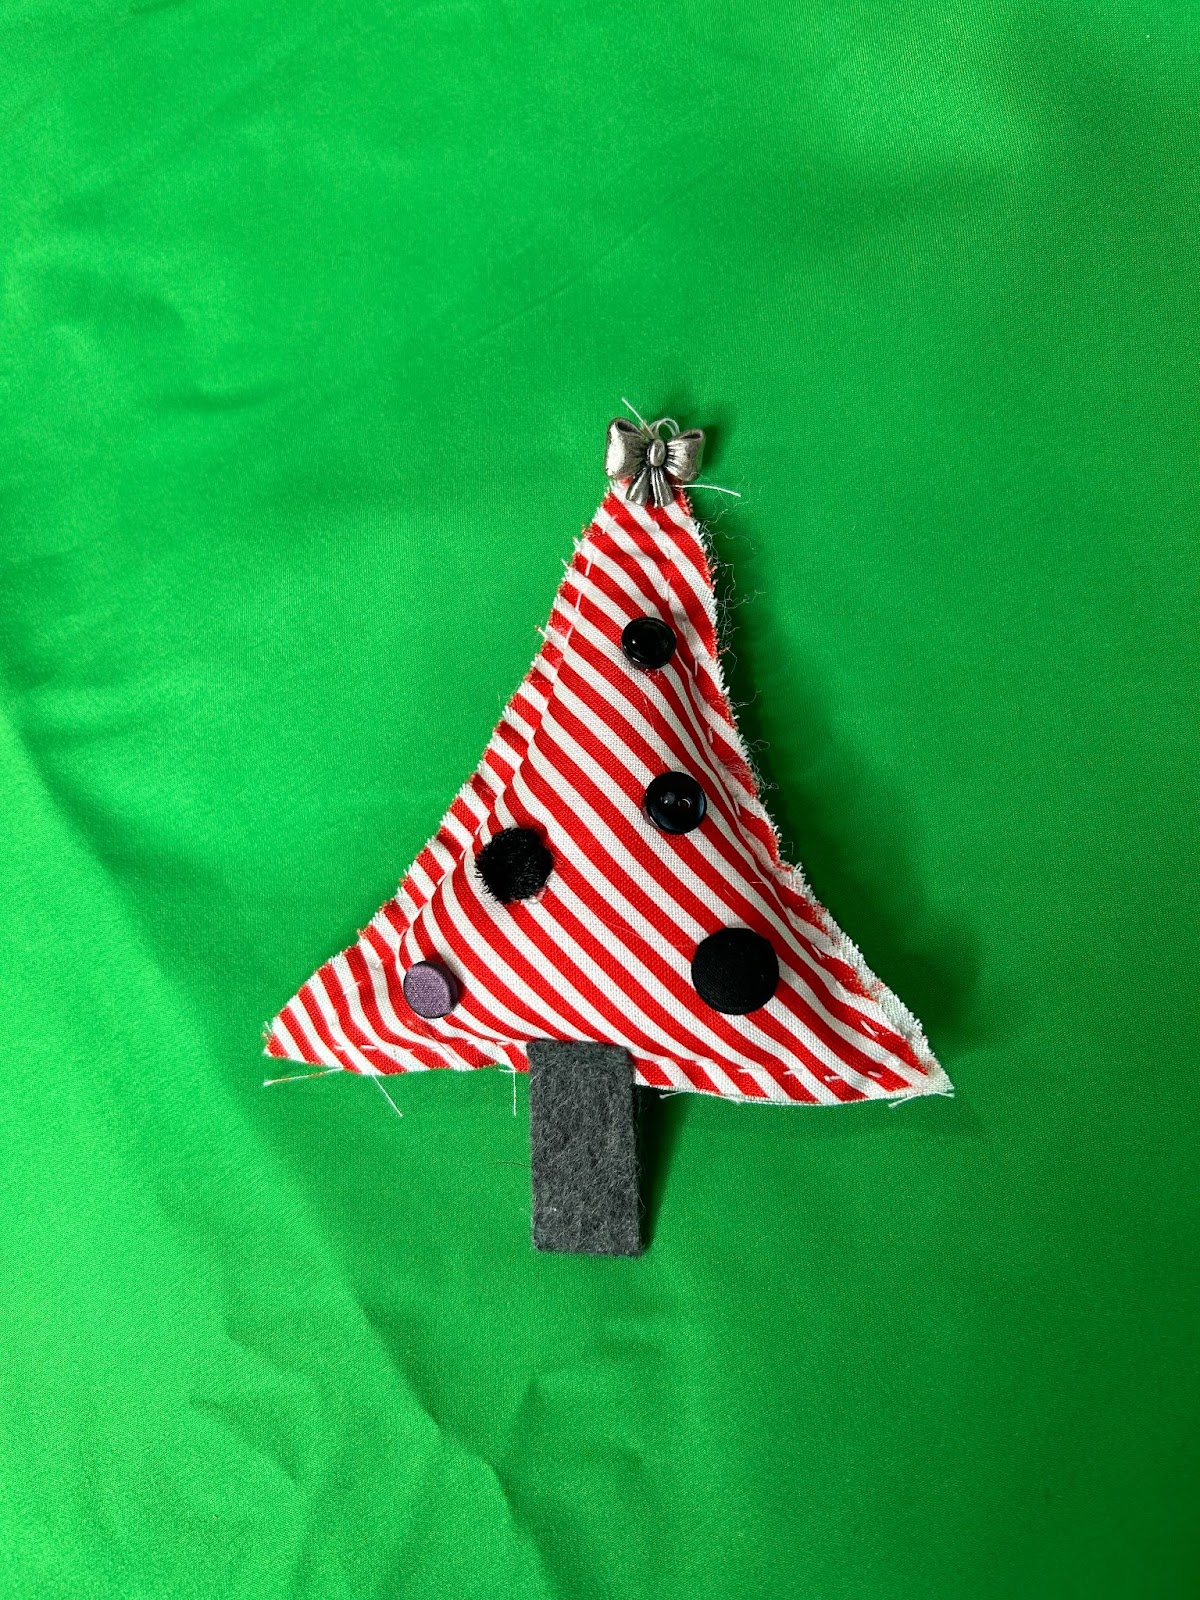
|
You will also need: Photo of student/yourself/person on green backdrop, posed to hold or interact with object in some way
OR
Photo of yourself with a festive backdrop (which eliminates the need to remove your own background) | 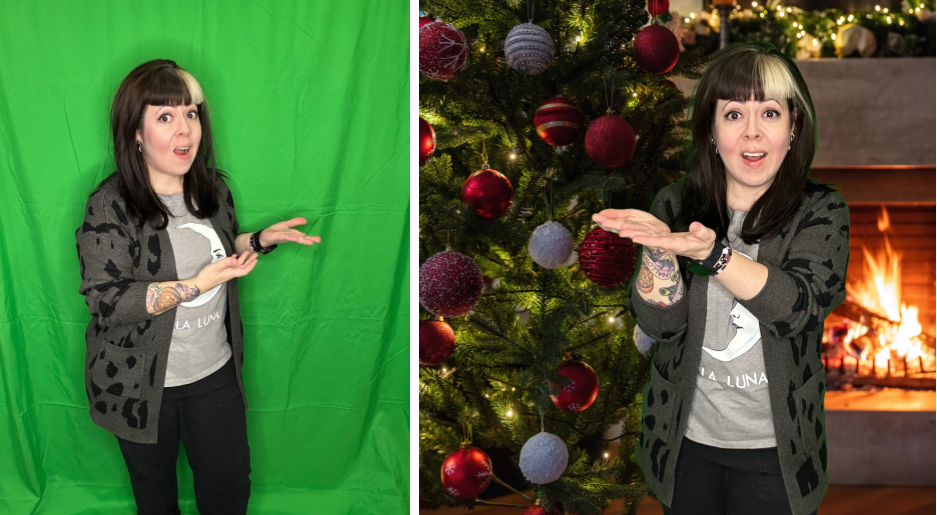
|
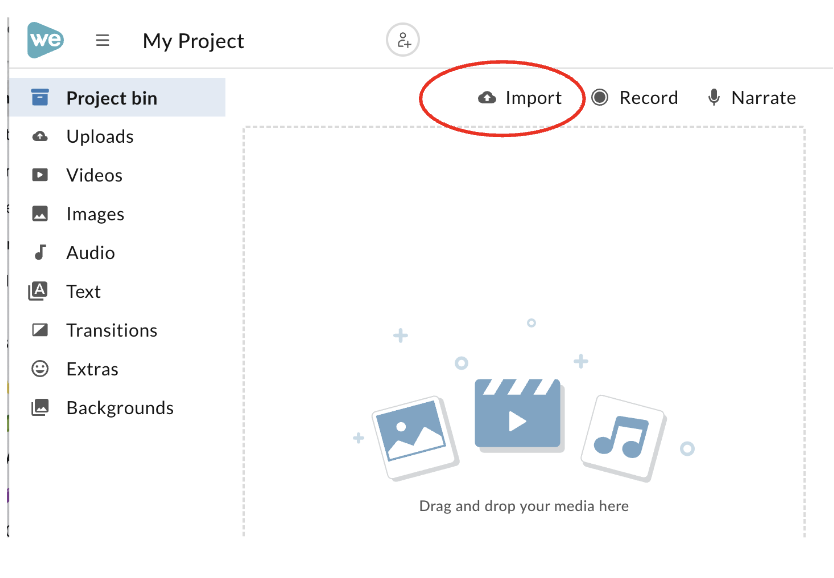
Go to WeVideo.com Sign in using Google Open a new project (click “Create”) Import your chosen/downloaded images from the steps above by clicking “import” and finding your files wherever you have them saved
Next, choose one of the options below:
| 
|
OPTION ONE:
Drag your uploaded content down into the timeline. Make sure the tree ornament is on the top track!
(To the right is an example of how two tracks looks: the tree ornament + the photo of someone against a backdrop)
Trim the content so that it’s all the same length! | 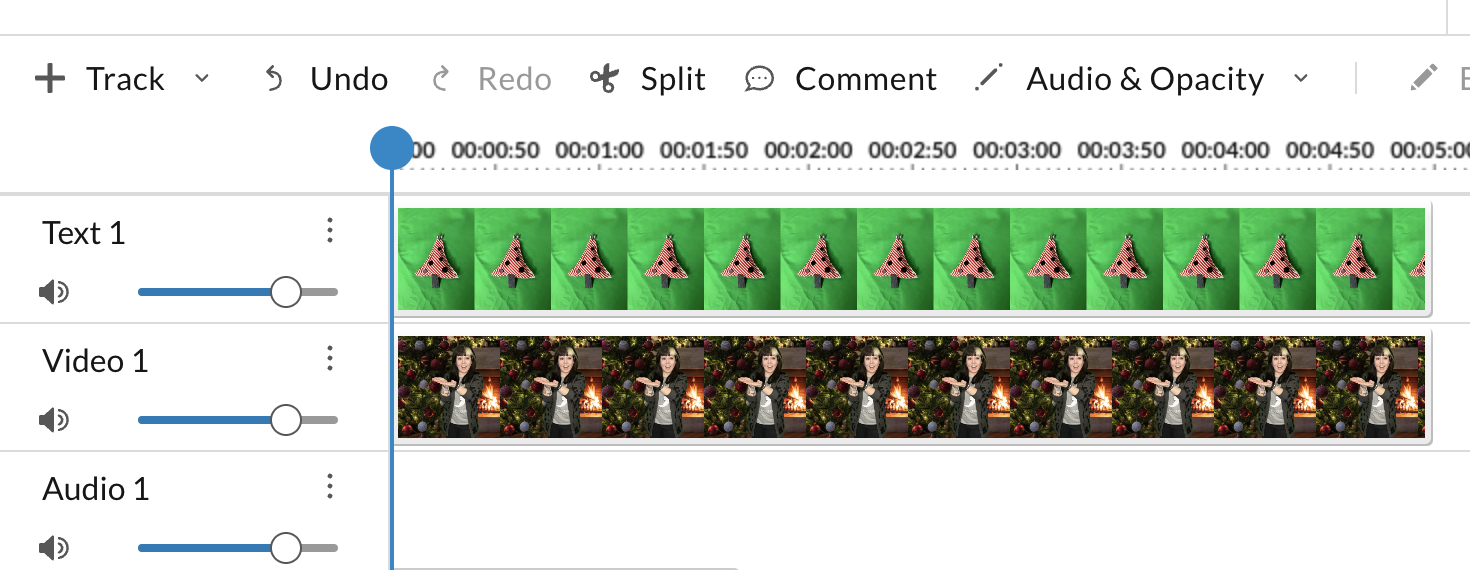
|
OPTION TWO:
(To the right is an example of how three tracks look: the tree ornament, the person, and a backdrop selected from the WeVideo library)
Trim the content so that it’s all the same length! | 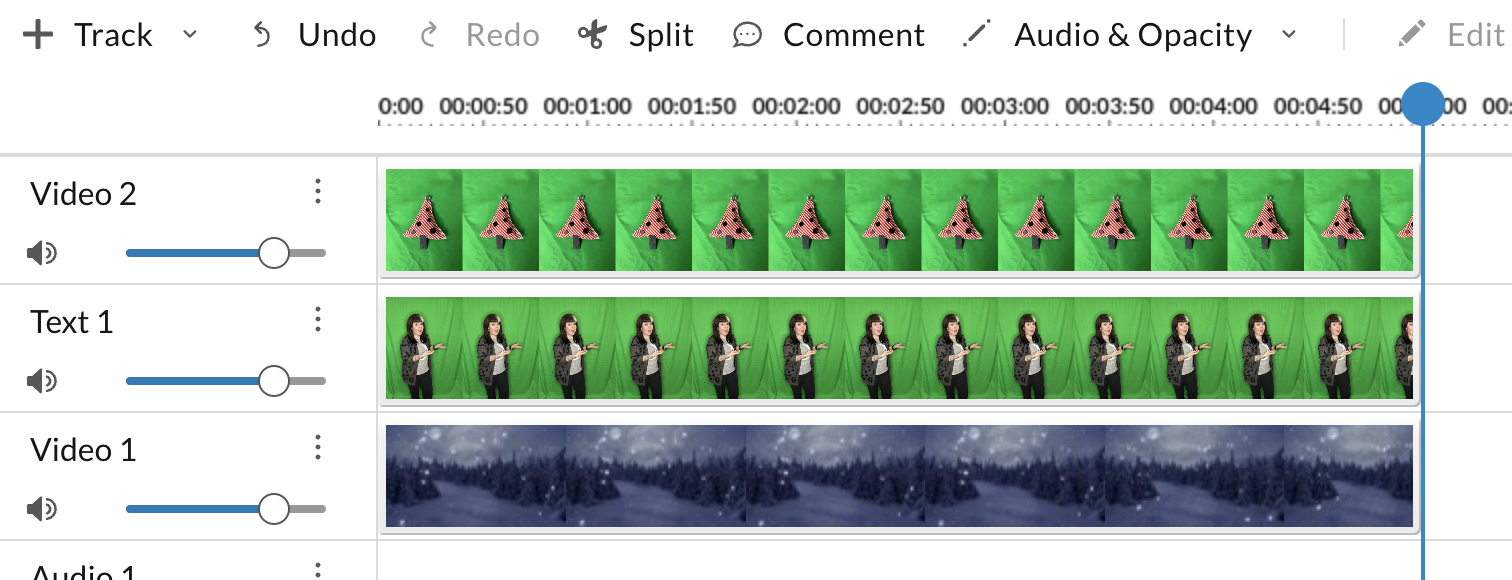
|
Now, remove the green backdrop from any clips by:
Selecting the correct clip Clicking the “edit” pencil icon Select “Keying” on the left side of the screen Click the eyedropper icon, Then click on an area of green in the preview pane Click “Done” (upper right)
(If you have two greenscreen clips, repeat this process) | 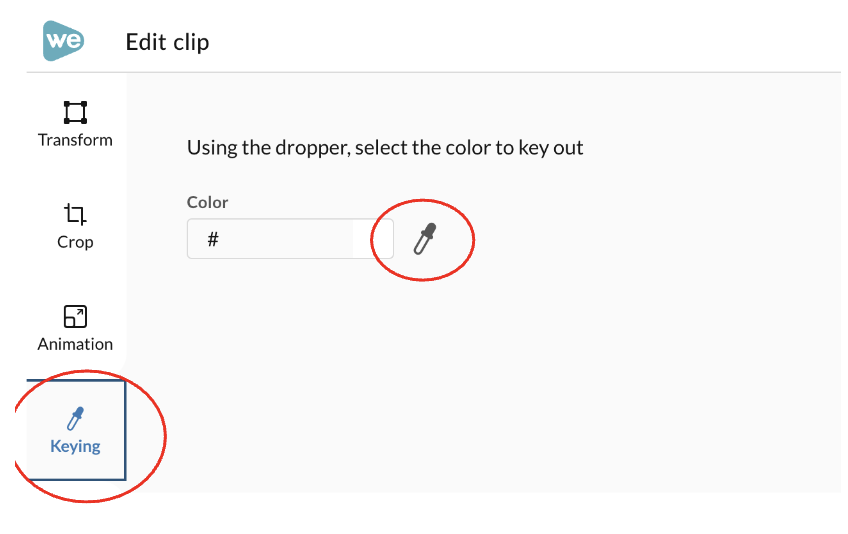
|
Now you will need to move and adjust sizing to arrange your image the way you want.
Select a clip, and then use the “edit” pencil icon to access tools like cropping and sizing/scaling.
Repeat this process on each clip as needed. | 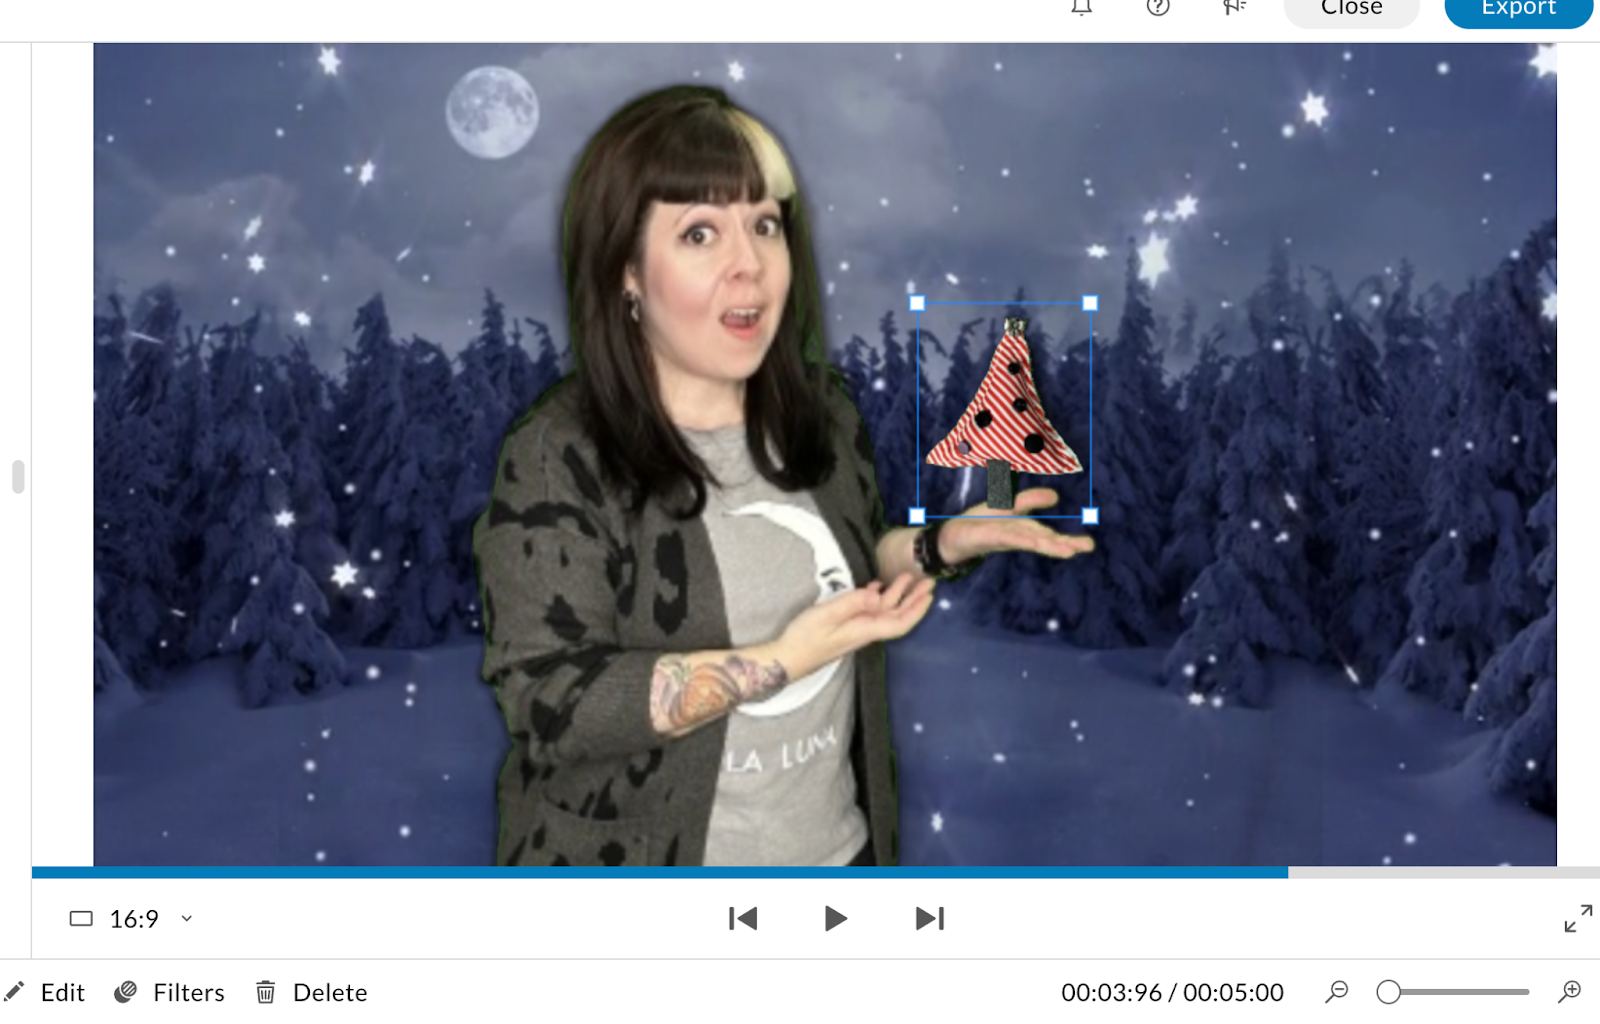
|
Now, you can animate the tree ornament:
Click on the ornament clip in the timeline Click on the “edit” pencil icon Click on “animation” Choose your start and end point of your clip Click “done.”
NOTE: If you want your ornament to move up, then down, or right, then left, you will need to duplicate this clip and repeat the process. | 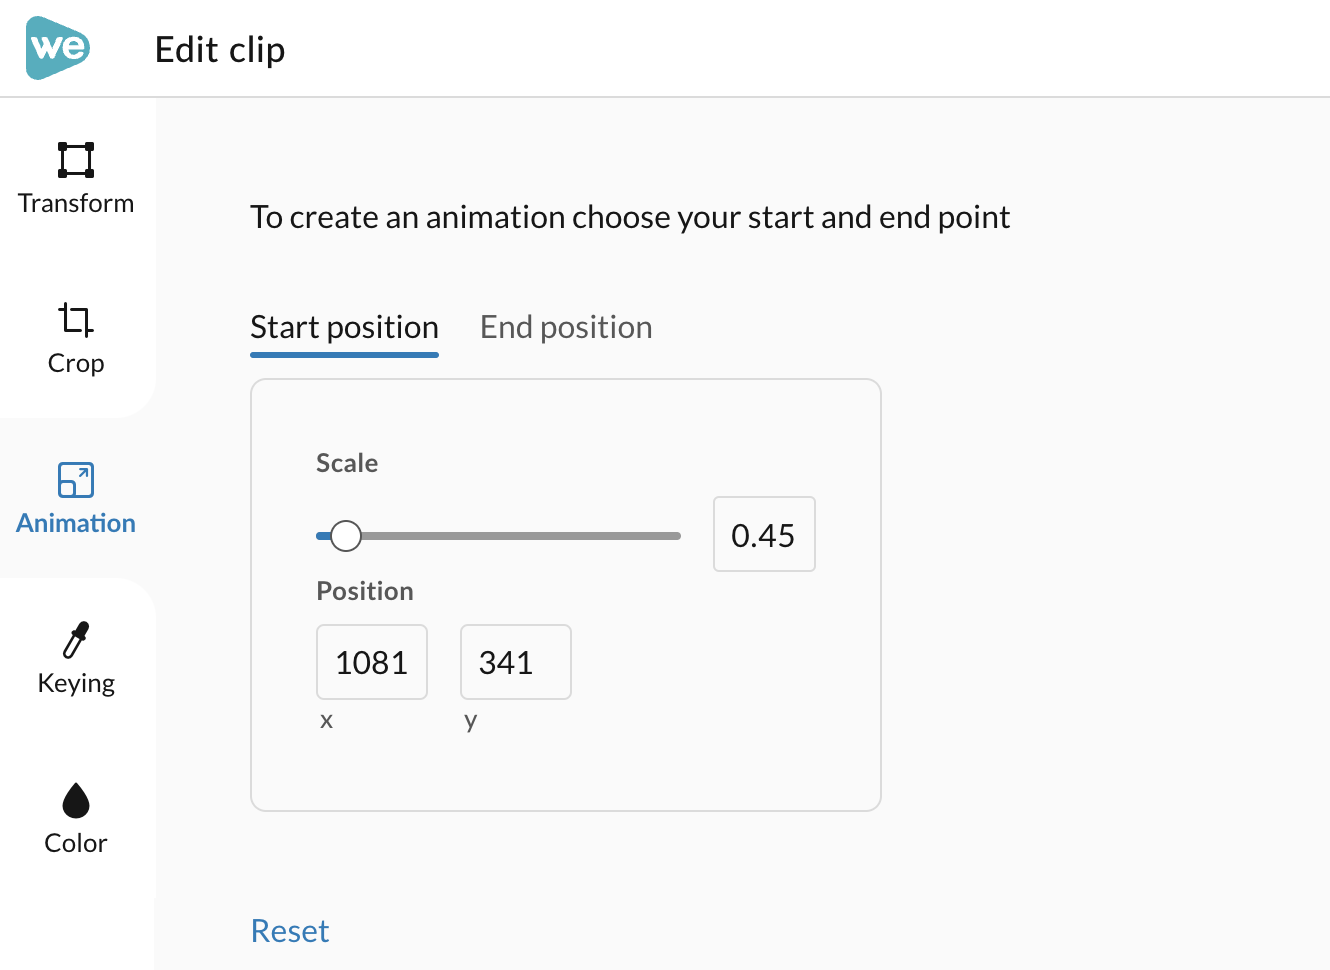
|
PRO TIP: If you hold down the SHIFT button while clicking and dragging on a clip, you can duplicate it easily. | 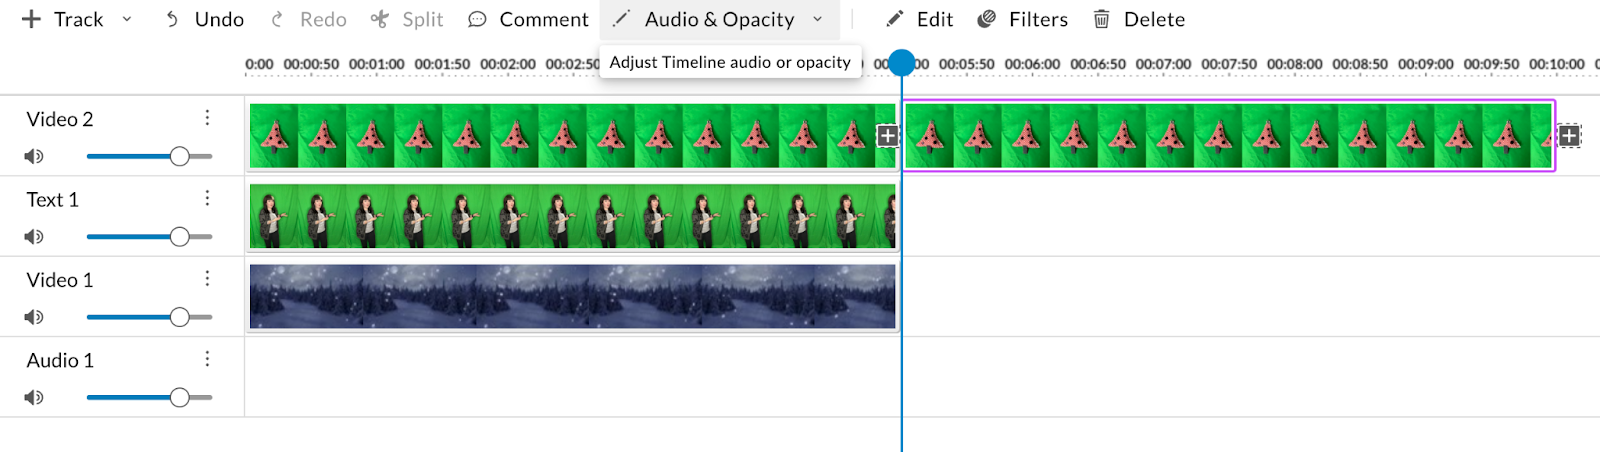
|
I ended up doing a 2-second animation up, and a 2-second animation down on my ornament.
Then, stretch/trim your other clips to length.
PREVIEW EVERYTHING! | 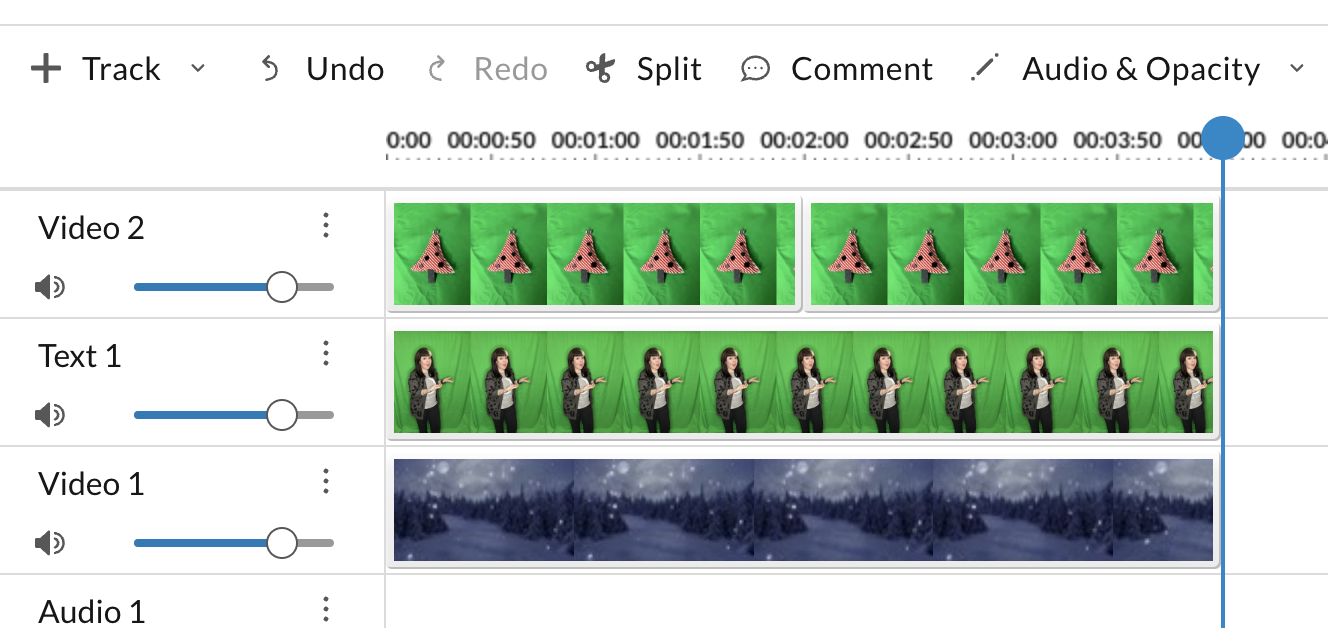
|
Does it look good?
Click “Export” (upper right)
Make sure that GIF is selected as your output
Click export, and wait for the magic to happen! | 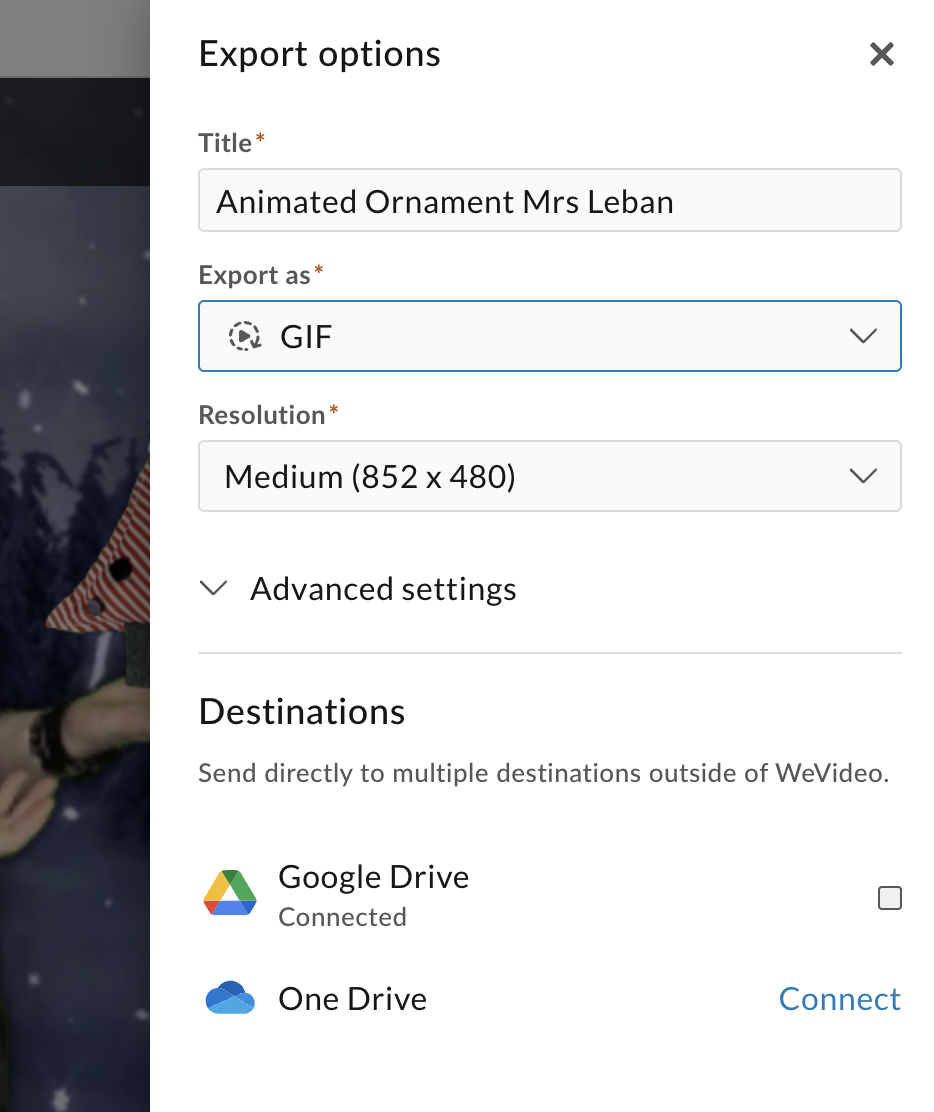
|
You can close the tab while it’s processing and work on something else without messing things up.
If you do not close your tab, you might need to refresh your screen after a few minutes.
When your GIF is ready, click “download” to save the file, and submit via Canvas or insert into another file, such as a Google Slide. | 
|
I love this project because it's a way to elevate an already existing project where students create an object, but they get to see it come to life!
Do you do any projects similar to this? How would you use this in the classroom?
- Jen